Sunday, November 10, 2013

November Novelties

There is nothing normal about our November creations and we couldn't be prouder of our handiwork!  Three tags, a lined envelope with a gift card to match, and a simple and unique Christmas card line up for a night of holiday themed Second Tuesday Stamping.


Some not so traditional colors, new stamps, pretty embellishments, and ribbon tied "the same only different" will have our stampers smiling from the start. The papers, inks, and accessories used in our projects are from Stampin’ Up! © 

Easy Endless Wishes

We were a bit reluctant to try the new acrylic stamp sets until Endless Wishes came along and stole our hearts!  This stamp set is aptly named because it gives our stampers truly endless possibilities for beautiful and unique combinations.  We chose the very merry and Christmas and couldn't be more pleased with how easy it was to make such an impressive card. 


Teaming up some pretty Soft Sky and Bermuda Bay and added a surprise splash of Melon Mambo on Whisper White was all it took to make this card a favorite. Sparkling Rhinestones floating around a Frosted Finish Embellishment make the Soft Sky Snowflakes seem to dance with the joy of the season. Who wouldn't be delighted with such an elegant result?  All papers, inks, and accessories used in this card are from Stampin’ Up! ©


A Lined Envelope with a Festive Flurry

Our stylish Season of Style Designer Series Paper lined envelope is just right for holding a 3" x 3" holiday greeting.  We wonder what we ever did before the Envelope Punchboard!  It is one of those stampers little helpers we just can't live without.  This project is proof of that.


We crafted a square envelope using the directions on our Envelope Punchboard for an envelope to hold our 3" x 3" card.  Making the envelope is a piece of cake--providing you are following the instructions!  The challenge of creating a pretty liner from Designer Paper was easily met thanks to the help of the Mary Fish video tutorial One Minute to WOW!  Thanks Mary!   Our little card showcases the Festive Flurry and Snow Day stamp sets.  A big punch and a little punch and our good old Christmas card standby, Cherry Cobbler to coordinate with the Season of Style DSP and it's a go!  All papers, inks, and accessories used in this card are from Stampin’ Up! ©

A Trio of Tags

Tags are all the rage, and our ambitions run high where celebrations are concerned. These three lovely embellishments are the result.  What a stylish accent to holiday gifting.


Our first tag took a color cue from this season's Winter Frost Specialty Paper.  Some Smoky Slate with Gorgeous Grunge, a Bermuda Bay tree from Warmth & Wonder with some Encore Silver and Silver Ribbon tied around some White Organdy and we have a winner!
* * * * * * * *
Move over Cherry Cobbler because there is a new fruit in town! Using Raspberry Ripple for a Christmas tag was a happy accident!  With our stock of ribbon running low, we had Raspberry Ripple Satin Stitched.  It works!  Tag two starts with the Be Merry Stamp cut out with a Chalk Talk Framelit and mounted on a piece of Raspberry Ripple Card Stock with the "keyhole" cut out made by using the framelit as a template.  A little Gumball Green Marker and some Burgundy (non-SU!) Stickles and we have a tag to be proud of!
* * * * * * * *
Tag three features Midnight Muse and Ornament Keepsakes Stamps and Holiday Ornaments Framelits.  Our Big Shot with a Magnetic Platform was, once again, a real help to line the ornaments up for cutting.  A Creative Elements flourish adds just a little fancy.  White Taffeta Ribbon secured with some Midnight Muse Satin Stitched Ribbon finished of this version of a nice tag we found on Pinterest.  Thank you Krista at Krista J Stamps for the idea for a nice 3-D effect.

All papers, inks, and accessories used in these tags are from Stampin’ Up! ©

Sunday, October 13, 2013

Seasonal Anticipation

             
October in Wisconsin has been an amazing experience!  We wanted our stampers to feel that amazement while crafting their beauties this month.


Sweater weather becomes more meaningful . . . Halloween turns "Thanksgivingful" . . . and our Christmas Star helps us anticipate the beauty of things to come.  Wonderful new stamps, thinlets, and punches with some tried and true techniques thrown in for good measure are sure to create some warm smiles as the chill in the air finds its way to our town!  All papers, inks, and accessories used in our cards are from Stampin’ Up! ©

Seasonal Starlight

It's never too soon to start thinking about the wonders of the Winter season.  Some bling and a big 3D star grace the front of this simple card.  You will get that warm and wonderful feeling putting this one together.


Christmas Star Card

The Christmas Star Stamp image starts out flat but ends up sporting some interesting dimension with a simple stamp, snip, and score. We used our paper trimmer scoring tool to score along the white lines in the Cherry Cobbler stamped image.  Mini mountains and valleys make the star come to life.  We attached it to the card front with small pieces of Dimensionals and gave it a shining star center with a large Rhinestone.  A strip of Season of Style Designer Series Paper layered over a strip of Cherry Cobbler Card Stock is adhered to a Whisper White Card Stock base.  A message--ours is from the Warmth & Wonder Hostess Stamp Set--nestles in the corner of the card.  Little Rhinestones scattered around to put interest into some white space add that zing from bling that we love!  We really must give credit for this idea to our Pinterest Friend, Nikki Spencer at My Sandbox.com.
 
It's all about sharing great ideas in our creative paper world!   All papers, inks, and accessories used in this card are from Stampin’ Up! ©

Sunshine and Sweater Weather

Who can resist a try at capturing the beauty of Mother Nature in the Fall of the year?  Not us for sure!  Falling leaves on a sunburst and some embossing for interest create seasonal drama that we are proud to share.  We borrowed a technique for making summery paper flowers to create the realistic leaves showcased on this card. 


Autumn Sunburst Card

A little sponging in Chocolate Chip Ink on Tangerine Tango and Crushed Curry Card Stock leaves which we pre-cut with our Autumn Accents Bigz Die was just a start.  We spritzed with a little water, smudged the ink around, and crumpled the leaves into little wads.  We admit that it is a tiny bit messy, but when the leaves are "uncrumpled" and allowed to dry the result is nothing less than gorgeous.  We used the finished product as the centerpiece of this card.  Once you start making sunbursts, you won't want to stop.  We cut four 1 1/2" x 4" strips of Sweater Weather DSP on the diagonal and adhered them to a piece of partially embossed Very Vanilla Card Stock to make ours, but there are many more ways to make this impressive background.  Easy Sunburst Instructions are available in a video by our friend Dawn in her "How'd She Do That?" series.  A little strip of Designer Paper topped with 1/4" Chocolate Chip Grosgrain Ribbon is just the thing to provide a nest for the leaves.  The finishing touch on our card is the message from the Tags 4 You Stamp Set, punched with the Label Bracket Punch and popped up with a Dimensional.  All papers, inks, and accessories used in this card are from Stampin’ Up! ©

Thankful Expressions

Some interesting little twists and techniques make this card something to brag about!  We got a little glittery while turning the brand new Halloween Happiness Stamp into a creation we can be thankful about!  


Thankful Expressions Card

Our creation starts with a base of our old cardstock friend Old Olive and just gets better and better.  The Second Tuesday Stampers and friends are trying out the fun new Expressions Thinlits Dies from Stampin’ Up! © and we couldn't be more . . . Thankful! The message is cut from Old Olive Card Stock Scrap and we got some help from our Magnetic Board and the Big Shot to get a perfect cut.  We covered up the message on the Halloween Happiness Stamp with plain old tape and colored the leaves with Old Olive Marker and the pumpkins with Pumpkin Pie (of course!)  A little "huffing" and a firm stamp on Very Vanilla Card Stock was only the beginning.  We use a little more Pumpkin Pie to color on Silver Glitter Paper. A punch with our 1" Circle Punch and a pop with a Dimensional turns a Happy Halloween into a Thankful Expression. A little layering with Pumpkin Pie Chevron Ribbon tucked under our image gives just the right balance to this nice little creation.  

Don't forget the waxed paper trick to easily extract your expression of thanks from the die! Our thanks to  Meg Loven at Lovenstamps for helping us out with this one.
All papers, inks, and accessories used in this card are from Stampin’ Up! ©

Saturday, September 7, 2013

Fantastic Fall!!

       Fall has arrived and we are in love with the wonderful warm tones of Sweater Weather season.  

Who can resist some fun little splotches from Stampin' Up's © Gorgeous Grunge and a Gently Falling leaf?

       Trick or Treat anyone? Tangerine Tango seems like just the right shade of the season to show off a simply scary Hexagon punched Halloween.                

Looking ahead to a beautiful snowy Wisconsin winter, our Festive Flurry reminds us of things to come!


       All papers, inks, and accessories used in our creations are from Stampin’ Up! ©

Grateful Grunge

Grunge can be nothing but gorgeous when pretty Fall hues are teamed up with SU's © versatile stamp set Gorgeous Grunge. We are warming up the season with pretty choices from Sweater Weather accenting a "Rock n' Roll" falling leaf!  


Gorgeous Fall Grunge Card

We started with a little rockin' and rollin' using the Rock n' Roll technique and some two step stamping with Gently Falling.  Check out A Rock n' Roll Tutorial on You Tube with thanks to Carol Walsh at www.carolspolkadotparty.com.  Our Very Vanilla Card Stock Scrap comes to life with the return of Crushed Curry Ink and a little rolling around with Pumpkin Pie Ink.  That is just the tip of the iceberg on this really comfy card!  We used the Gorgeous Grunge set to make an interesting background in Soft Sky, Chocolate Chip (stamped off), and Crushed Curry inks. Three little strips of Sweater Weather Designer Series Paper torn and sponged on the edges, adhered over a Grungy striped stamp in Pumpkin Pie, and topped off with a sentiment from the retired Falling Leaves sets the stage for our leaf.  Pop on a button with Linen Thread and pop up the leaf with Dimensionals and you have the makings of a masterpiece.  We finished this beauty by sponging the edges of the card front with Chocolate Chip Ink and roughing up the edges with the Distressing Tool.  Put it all on top of some Chocolate Chip CS.  Yummy!  All papers, inks, and accessories used in this card are from Stampin’ Up! ©

A Hex on Halloween

The ghosts and goblins are just around the corner and the Best of Halloween stamp set is a perfect way for our Stampers to be prepared.  Tangerine Tango plays a repeat performance in a big way on this card.  The Hexagon Punch with some circles, a fancy scallop on some Designer Paper and we are ready for some Tricks and Treats.


Happy Halloween Hex Card

This card is easy and impressive at the same time!  We stamped on Whisper White Card Stock with some Black Stazon, punched with the Hexagon Punch, and sponged with Crushed Curry and Tangerine Tango Inks.  The images mounted on coordinating circles of card stock are showcased on Basic Black Card Stock and a strip of Sweater Weather Designer Series Paper.  This DSP is rapidly becoming a favorite of the season, but we made it even better by trimming the edges with the brand new Stampin' Trimmer Rotary Addition & Small Scallop Blade.  Talk about a treat!!!  We can't get enough of this one.  All papers, inks, and accessories used in this card are from Stampin’ Up! ©

A Flurry of Flakes

Warmth in winter???  Absolutely!   The Warmth and Wonder Hostess Set keeps us feeling toasty while a pretty Festive Flurry of flakes shows off on this pretty peek at winter.  Our new Magnetic Platform, a Big Shot and the over the moon wonderful Circle Card Thinlits made our first try at this cutout and multi-fold card an exciting adventure. 


A Warm and Festive Flurry Card

We got a little help on our first try with the new Thinlets from our friend Dawn at DO Stamping and her excellent Thinlit Card Die Tutorial on You Tube. The possibilities are endless!  We started by cutting and folding our Bermuda Bay Card Stock with the help of our brand new Thinlets. They come with their own set of fun accent framelits, but we dressed this card up with the Festive Flurry Stamp Set and coordinating Festive Flurry Framelits.  We gave Smokey Slate Ink a try and were happy with the result.   Magnetic Platform, where have you been all this time?  What an easy help to hold everything in place while we shape and cut and score.  This card is as pretty and interesting open--where you can see the Warmth and Wonder Hostess Set greeting--as it is folded up right out of the envelope.  


The Silver 1/8" Ribbon, some Winter Frost Designer Series Paper and a fancy little Rhinestone make this our showpiece of the month!  Let it snow, let it snow, let it snow!  All papers, inks, and accessories used in this card are from Stampin’ Up! ©


Saturday, August 10, 2013

Awesome August!!!


   Wow!!  We love it in Wisconsin when the corn is getting sweet but we love it most when our stampers are trying out some even sweeter paper creations!

vvvv
   
   A little dry emboss, a punch here and there, new stamps, old standbys, and pretty accessories make us very happy stampers!


All papers, inks, and accessories used in our creations are from Stampin’ Up! ©

The Flap Over Chevron

To say that the Chevron pattern is trendy is an understatement.  It is everywhere these days, and in all shapes and sizes.  This interesting card is a take off on one we borrowed from our Pinterest friend Deb Valder and is a little bit "flappy."  Check out Deb's blog at http://stampladee.com/building-a-chevron-pattern-with-deb-valder for examples and detailed Chevron Building instructions. 


Flapping Chevron Card

Our card stock choices, Chocolate Chip, Crushed Curry, and Very Vanilla are the perfect compliment to the Sweater Weather Designer Series Paper that makes the interesting Chevron design. We cut 5 pieces of Designer Paper into 2 1/2" x 1" pieces. Three of the pieces are folded right to left, and the other two left to right. We arranged them down the side of our card on the 4" x 5 1/4" Very Vanilla Card Stock and set them off with a Crushed Curry strip.  It is all topped off with a perfectly flat little Chocolate Chip bow created with the help of a bow maker.  (It helps to be married to a guy with tools if you don't have a handle on how a router works!)  Check out the video at http://www.youtube.com/watch?v=edXztadbyYY to learn how to make the perfect flat bow and have a look at the simple bow maker tool. Don't forget the friendly greeting from Occasions Alphabet accented with three little brads perfectly lined up with the help of the Essentials Paper Piercing Pack.  A giant thanks to our Second Tuesday Stamp Club friend Annette, who suggested this might just be a good one to try!  All papers, inks, and accessories used in this card are from Stampin’ Up! ©

Fancy Fan and Flowers

Who doesn't love a pretty flower?  We just couldn't resist sharing this sweet gem of a card with our stampers.  It is especially fun to see them giving the new Flower Shop stamp set and Pansy Punch a really good workout!


Flower Shop Fun Card

This is a card that couldn't be easier, but you would never know it by looking. What a beauty with a minimum of effort!  Our good old standby, Whisper White Card Stock gets "cornered" with the 3/16" Corner Rounder and topped off with a Fancy Fan dry embossed strip of Rose Red punched out with a 2 1/2" Circle Punch.  We've seen this technique done with a large oval as well--whatever strikes your fancy!  The centerpiece is the Flower Shop flower stamped in Rose Red, punched with the Pansy Punch, and popped up in its own little space with a Dimensional. The pansy punching is a little tricky, but we got some help to eliminate the frustration on You Tube.  Check out the super alignment tips at:
http://www.youtube.com/watchv=FxVfySyiYWM or http://www.youtube.com/watch?v=4R1o_IvDVEA.  We had fun trying out the new Regals Candy Dots and Candy Dots Brads to accent our pretty posey.  The three cute little flowers are from the Itty Bitty Shapes Punch Pack, and are topped off with a dab of Liquid Pearls. Looks like a picture straight from our summer garden!  All papers, inks, and accessories used in this card are from Stampin’ Up! ©

A Very Vintage Experience

Vintage meets a little grunge!  We pulled out our Postage Due Stamp Set, wiped the dust off, and got to the business of making this interesting collage style card.  We couldn't wait to get started and this beauty is the result!


Vintage Postage Due Card

The large background image from the Postage Due stamp set is the base for a card that is sure to be one of our favorites.  Our simple color combo of Crumb Cake, Cherry Cobbler, and Midnight Muse work beautifully to give our creation an old fashioned look. We frayed the new Burlap Ribbon just a little, added some Linen Thread to tie up the Very Vintage Designer Button and it was an easy creation from there on in!  A strip of retired Designer Series Paper and a strip of Midnight Muse shows off the postage stamp images, and the message from Banner Greetings, becoming a famous favorite already, seemed like a perfect compliment!  The icing on this cake is a nice little sentiment stamped in Cherry Cobbler from the many choices on the Remember This and That Rotary Stamp.   All papers, inks, and accessories used in this card are from Stampin’ Up! ©

Monday, July 15, 2013

Making Fireworks of Our Own!

While the fireworks are lighting up Wisconsin skies our three fancy cards for this month are spectacular in their own right!
We did some sweet "kissing" and some fancy folding--and if that isn't spectacle enough we "painted" a beautiful background with painter's tape. 


Ooohs and Ahhhs abound!


Our papers, inks, and accessories are from Stampin’ Up! ©


Saturday, July 13, 2013

Embossed Kisses

Kissing isn't just for sweethearts!  We love the new July/August Stampin' Success Magazine featuring a new twist on an old technique.  Our flowery beauty uses the Embossed Kissing Technique along with a nice Washi Tape accent.  Easy peasy and just plain sweet!!!


Embossed Kissing Card

We started with some Pear Pizzazz Card Stock, layered it with Gingham Garden Designer Series Paper, and topped it off with a gorgeous floral feature on Whisper White Card Stock framed with Strawberry Slush.  The floral is arranged over a piece of Gingham Garden Washi Tape.  Just the thing to pull everything together.  To accomplish the interesting design on the Secret Garden Flower we stamped in in Strawberry Slush Ink and simply stamped off on a piece of card stock we embossed with the Square Lattice Embossing Folder.  The finished product on Whisper White Card Stock and cut out with the Secret Garden Framelits makes a big "WOW" on this card.  The Pear Pizzazz Leaves are compliments of the Secret Garden sets as well.  We found the button in our jar of strays and it seemed to fit just right.  Topped off with a message from Petite Pairs, this card is ready to go!  All papers, inks, and accessories used in this card (except the green button) are from Stampin’ Up! ©

Saturday, July 6, 2013

Pretty Painter Silhouettes

A little bit of blue painter's tape, some pretty "In Colors" and everyone's an artist.  This card looks so good our stampers will want to put their autograph on the front!


Pretty Painter Silhouettes Card


We marvel at how easy this masterpiece was to create.  Three strips of ordinary blue painters tape inked up with Baked Brown Sugar, Pistaschio Pudding, and Crisp Canteloupe Inks are pressed onto some Very Vanilla Card Stock.  When the ink is removed an interesting background is ready for a Serene Silhouette stamped over in Early Espresso Ink.  That's all there is to it!!!  Our message is extra special with the pretty round Serene Silhouette Stamp stamped in Pistachio Pudding Ink and messaged with a Teeny Tiny Wish.  We punched it out with a 1 3/4" Circle Punch and popped it up on the card front with a Dimensional.  The Crisp Canteloupe Card Stock base makes a pretty frame for this lovely card.  All papers, inks, and accessories used in this card are from Stampin’ Up! ©

Flip, Fold, and Fun!

A piece of Designer Series Paper, a simple gate fold style technique, a little trimming and folding, all topped off with a feature on the front.  Impressive!!!  


Flip and Fold Card

We have an abundance of really nice retired Designer Series Paper to use up.  Sharing this card with our stampers seemed like a really great way to do that!  We cut our DSP into a 5 1/2" x 12" piece and scored at 2", 4", 8", and 10".  A triangle off the top of each side, flipped and glued to the bottom creates a really pretty accent and gives the card its unique shape.  For video instructions check out the You Tube by Beth Beard.  Our feature, which completes the front and welcomes you into this gate card is created with Label Love, Pappillon Potpourri, and A Round Array stamp sets.  To finish it up we punched a bunch!  The coordinating punches include Artisan Label, Elegant Butterfly, and the cute little 7/8" Scallop Circle Punch.  Don't forget the rhinestones for some butterfly bling. All papers, inks, and accessories used in this card are from Stampin’ Up! ©


Friday, June 7, 2013

June Brides, Birthdays, and Baubles


We can't say enough about the brand new colors from Stampin' Up©

 and we put them to good use this month along with a wonderful variety of techniques, stamps, punches and more!  Our summer stampers get to play with all kinds of newbies.  We're warming up in Wisconsin!


Thursday, June 6, 2013

You Can Almost Smell The Flowers!

Rounding up some meadow flowers is the best way to welcome summer.  Our simple but elegant card features a brand new way for Stampin’ Up! © to combine stamping and embossing.  This version of our Wildflower Meadow is in Crisp Cantelope.  Our stampers will get to try it in Coastal Cabana.  Why not make several and give all of the new In Colors a workout!!


A Wildflower Meadow Card

Sweet and simple.  This is a beautifully textured card with some very nice touches.  One stamp with the Wildflower Meadow Stamp, a quick run through the Big Shot with the Wildflower Meadow Embossing Folder and we are good to go!  We made the  cute little bow by wrapping the 1/8" ribbon around the tines of a dinner fork and tying the bow together with another length of the same ribbon.  The more wraps the merrier.  A handful of pearls and a message made with Itty Bitty Banners Stamps and Framelits makes a picture perfect finish.  You can almost smell the flowers and hear the birds singing in this summer meadow.  All papers, inks, and accessories used in this card are from Stampin’ Up! ©

Mosaic This, Mosaic That--It's Madness!!!

Shapely mosaics rule the roost in this creation!  Everything fits together from the Mosaic Madness Stamp Set to the Modern Mosaic Embossing Folder.  Of course there's the Mosaic Punch to help pull it all together.


Mosaic Madness Card

This card is fun to make and simple to put together.  The possibilities are endless when stampers team up the Mosaic Madness Stamp Set with all of its coordinates.  The accent paper is Quatrefancy Designer Series Paper and it goes great with the Mosaic Punch and the Modern Mosaic Embossing Folder.  When we pulled out the brand new In Colors things started to get interesting!  This card showcases Coastal Cabana, Pistacio Pudding, Crisp Cantelope, and Strawberry Slush.  Delicious!  The Itty Bitty Shapes Punch and some Rhinestone bling didn't mind adding an accent for this design!  Thanks to Leena Girsa at alacards.blogspot.com.  Another great Pinterest find!  All papers, inks, and accessories used in this card are from Stampin’ Up! ©

Unique Weddings Deserve Unique Greetings


June is the month for brides and we couldn't let this month slide by without creating a unique wedding card.  Truthfully, we wanted to try out the new Label Love Stamp Set from the brand new Stampin' Up© catalog and what better way to do it with this sweet rendition of Mr. & Mrs.


A Card For The New Mr. & Mrs.

Soho Subway Designer Series Paper accents the Very Vanilla Card Stock base for this variation on a theme.  We tried this card every which way until it looked just right.  A little bit of swirl and some elegant looking script was just begging for some frosting so we popped up a Crisp Cantelope stamped flower from Best of Flowers punched with the 1 1/4" Scallop Circle.  It all fits together like a glove.  Some coppery glitter in the center is just enough bling!  The new Artisan Label Punch is sure to be a favorite this year.  We stamped the greeting on Very Vanilla Card Stock in Early Espresso Ink and punched away.  Then we made a nice frame with Early Espresso Card Stock by slicing two punched pieces in half and lining them up behind the greeting.  We're pretty sure this is just the beginning of the possibilities with these new toys!  All papers, inks, and accessories used in this card are from Stampin’ Up! ©

Sunday, May 12, 2013

May Flowers and Sunshine


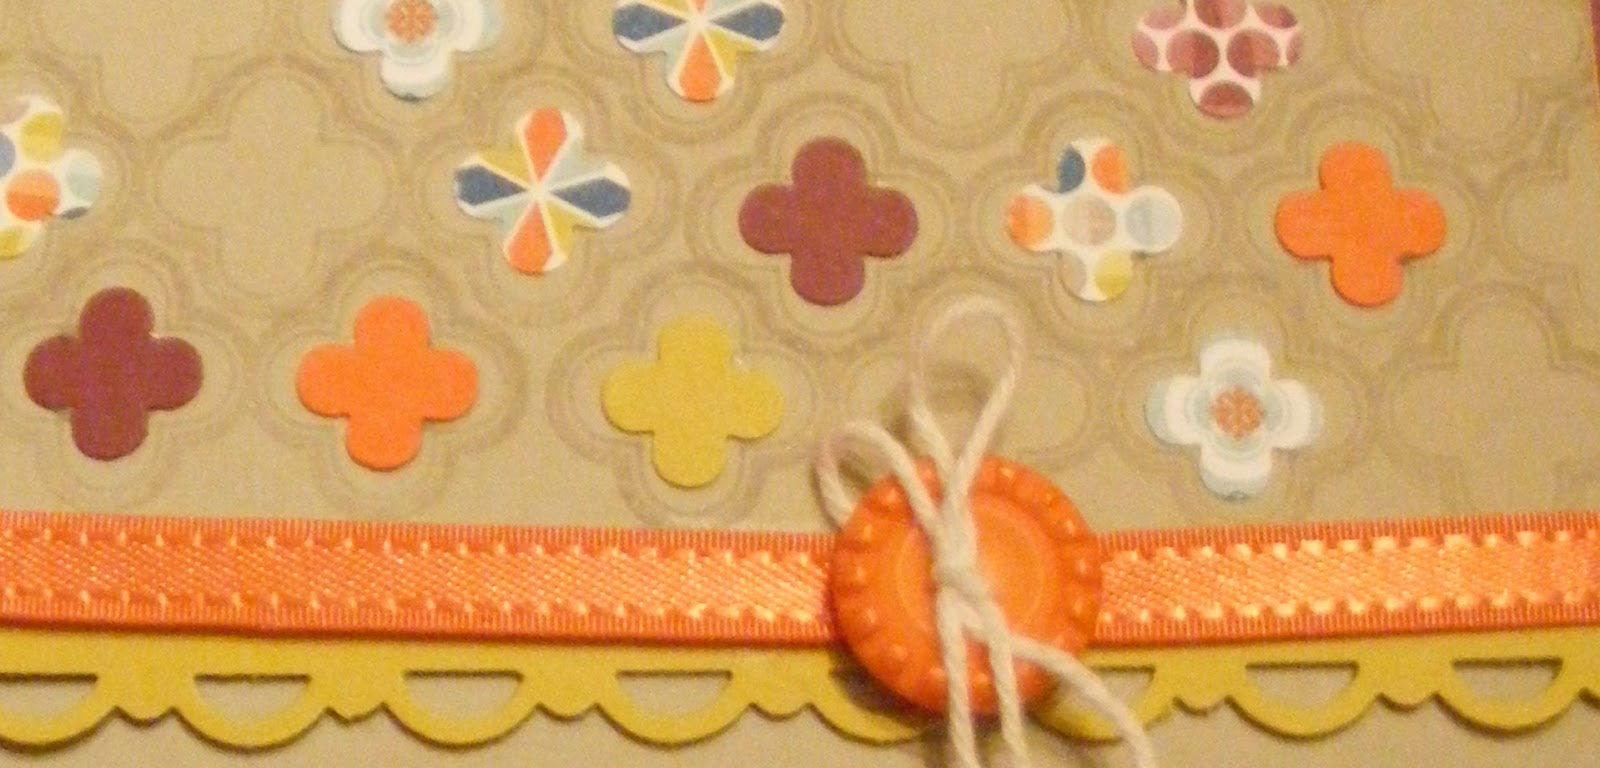
Our May Stampers use a host of tiny techniques, a little bit of ribbon on every project, and flowers, flowers, flowers.  We're so glad the sun is peeking through after our long Wisconsin winter that we just had to make a "Sunshiny" card along with our Spring blooms.


We use papers, inks, and accessories from Stampin’ Up! ©

Elegant Rose Red Posies

Elegant lines defines this lovely May card.  It just seemed right to use the Elegant Lines Embossing Folder to create the flowers.  We found a pretty card using the punched and folded flower technique on Pinterest and put our own spin on it.  Thank you lindas-stampinloft.blogspot.com for a really nice start.  Our stampers get to exercise some of their artistic talent drawing freehand  lines for the stems.  Go crazy - - it's Spring!!!!


A Simply Folded Flower Card

Little mini techniques abound in this beauty.  Our card uses a fun punch technique to turn a curvy Scallop Circle Punch circle into one with pointy little flower petals.  The Elegant Lines embossed Rose Red Card Stock gets punched, turned, and punched again (with the help of a sticky note to hold on.)  Then we fold them in half hugging a Dimensional.  The freehand Old Olive Marker stems will each reflect the imaginations of our stampers as they draw right over the Rose Red sponged First Edition Designer Specialty Paper.  Leaves are punched from Old Olive Card Stock and arranged on the stems.  A final technique challenge let our stampers try their hands at gathering Seam Binding Ribbon on a Modern Label backed with a very sticky double-sided tape.  Our message is from Teeny Tiny Wishes stamped in Early Espresso Ink and is adorned with Silver 1/8" Mini Brads and popped up with Dimensionals.  Framed with Rose Red and Old Olive Card Stock, this card is sure to give a feeling of Springtime romance!  All papers, inks, and accessories used in this card are from Stampin’ Up! ©

Daffodil Delightful Sunshine

You won't see anything flowery on the face of this cute card, but wait!!!!  The whole thing is a giant Daffodil Delight full of Springtime sunshine.  An interesting spin on the "chalkboard" technique was our latest Pinterest find.  We love visiting there for great ideas.  Many thanks to laurasworksofheart.blogspot.com for posting this idea.  


Sunshine on a Chalkboard

Using the Embossing Buddy to "chalk up" the board is a clever way to give the impression of an old fashioned blackboard.  You can almost see the chalk dust filling the air as you cleaned those erasers back in the day!  Showcasing the Sunshine Single Stamp is the perfect way to show off the wonderful contrast between the yellow of Daffodil Delight and the Basic Black "Chalkboard" mounted on a Crumb Cake backing.  The accents that struck our fancy were the scallop of Whisper White, a Papillon Potpourri butterfly, not to  mention the cute little "smiley" we just drew on a dot.  We topped it off with "bunny ears bow" you can try yourself--check it out on You Tube.  http://www.youtube.com/watch?v=YYHhYKbtVnQ.  All papers, inks, and accessories used in this card are from Stampin’ Up! ©

Blossoms, Blossoms, Blossoms

Who wouldn't want to be the May birthday recipient of a card stamped liberally with the beautiful Betsy's Blossoms?  Another simple masking technique and some pretty ribbon make this one a winner!


Masking Betsy's Blossoms

It wasn't too much fuss to make this really fun card.  Whisper White Card Stock provides the blank slate.  Wild Wasabi, Melon Mambo, Daffodil Delight, and Pacific Point Ink add the splash.  We made a one inch wide mask and stamped away!  The pretty little bird stamped in Pacific Point Ink and snipped out gets popped up with a Dimensional to add some interest.  The 5/8" Pacific Point Grosgrain Ribbon is retired . . . but not tired!  We poked the short pieces of ribbon through some holes punched with our Crop-A-Dile and taped on the back for a nice and easy touch.  The message is from Bring on the Cakeone of our favorite stamp sets.  We framed it all up with Pacific Point and Melon Mambo Card Stock.  Fabulous!  All papers, inks, and accessories used in this card are from Stampin’ Up! ©

Friday, April 5, 2013

April Birds and Butterflies


Stampers are trying their hand at three simple--and simply beautiful--cards
to get us in the April showery, May flowery mood.


* * * * *

We are featuring a fabulous black bird and some colorful butterflies.  Mom's going to love her Mother's Day card popping with some pretty "Designer" designs.

We want to thank our friends at Pinterest for great ideas and designs!  All materials for this months cards are available at Stampin' Up!©


Popped Up and Pretty--Just for Mom!

Wow!!!!  Mom will love this unique card with it's simple white on white styling showing some real character!  The popped up images show off a bright array of designs and colors that live peacefully with Sharpie accented rhinestones.  Thanks for the great idea dahliamemories.blogspot.ca.  Another priceless idea from Pinterest! 


Mom's Bitty Butterflies Card

We started with the most important part on this card . . . the stamped greeting to MOM . . . carefully picked from the Delightful Dozen Stamp Set.  The butterfly circles are created with the Bitty Butterfly Punch and the 1 3/4" Circle Punch.  Magic happened when we used our Dimensionals to pop those plain white butterfly circles over the top of three International Bazaar Designer Paper circles punched with the 1 3/8" Circle Punch and adhered to the card front. You have see this one in person to really get the full fabulous effect.  Three rhinestones colored with Sharpies give our Mom's Day card some real class.  All papers, inks, and accessories used in this card (except the Sharpies) are from Stampin’ Up!© 


Fluttering by a Silhouette

We teamed up some of our favorite techniques to make this silhouette card.  It gives us such a tranquil feeling . . . we can almost feel the brush of the butterfly wings!


Masked Silhouettes Card

We masked and sponged and stamped and pierced our way to this gorgeous card.  The message from Fabulous Phrases seemed absolutely perfect for this creation.  An Oval Framelit was used to create the mask which was taped over a piece of Very Vanilla Card Stock just long enough to sponge some soft color of Calypso Coral and Marina Mist Ink blended just right.  A stamped image from one of our favorite stamp sets--Serene Silhouettes--is topped off with a beautiful butterfly created with the Elegant Butterfly Punch and the Papillon Potpourri Stamp Set.  There is a second butterfly punched from Midnight Muse Card Stock and tucked behind the stamped butterfly creating a shadowy effect.  The finishing touch is the pierced accent over the wing tops made with the help of the Occasions Paper Piercing Pack and piercing accessories.  The card base features layered Calypso Coral and Midnight Muse Card Stock.  This card feels so good it made us think of our most fabulous of friends so we picked an appropriate greeting from Fabulous Phrases!  All papers, inks, and accessories used in this card are from Stampin’ Up! ©

Bird Builder Beauty

We built this beauty of a blackbird with the Bird Builder Punch.  Simplicity at its best!


Black Bird of Happiness

This dramatic card shows just how easy it is to create a beautiful card with only a little effort!  The Basic Black bird and leaves created with our Bird Builder Punch is showcased inside Window Frames Framelits in more Basic Black and some pretty Shimmery White Card Stock.  The message is from the Loving Thoughts Stampin' Up!© stamp set.  We spend entirely too much time at Pinterest but we are sure our stampers don't mind.  Thanks for sharing www.stampwithbrian.com!  All papers, inks, and accessories used in this card are from Stampin’ Up! ©

Monday, March 11, 2013

March Creations Tame the Lion

March came in like a lion here in Wisconsin, but that can't stop our stampers from celebrating Spring--which we know is right around the corner.  This month our creations feature cheery cards that can warm even the chilliest of March days and nights!  The Second Tuesday Stampers and Friends are stamping their way to Spring with a boisterous bloom, polka dots, itty bitty shapes and even a bitty butterfly.


Who Ever Heard of a Polka Dot Sandwich?

A little Polka Dot Parade Designer Series Paper, some Whisper White Card Stock, beads and a butterfuly make this card one you would be proud to give!


Polka Dot Sandwich Card

What can you do with polka dots?  Turns out that there are plenty of interesting combinations on that theme!  Stampers can try their hand at the many colors included with the Polka Dot Parade Designer Series Paper from Stampin’ Up!©  Our sample shows just one of the great combinations creative stampers can use on this beauty!  A paper ribbon made with the Dotted Scallop Ribbon Punch and variety of coordinating card stock adds interest to the card, and what would our effort at "cheeriness" be without a Bitty Butterfly with Basic Pearls to carry out the theme while accenting the Whisper White Card Stock card front. We even "sandwiched in" the message from Sweet Essentials.  All papers, inks, and accessories used in this card are from Stampin’ Up! ©


Our Twist on the Twisted Fun Fold

A little bit of Whisper White--a funky little fold--and there you have it!!!  A Twisted Fun Fold with some cheery Designer Series Paper and a special little bloom to spice up a foggy March day.


A Twisted Fun Fold Card

Prize winning!!!  At least in our Second Tuesday Stampers book!  This card is easy and fun to make and there are dozens of ways to accent this impressive funky fold.  First we scored our 4 1/4" x 11" Whisper White Card Stock on a diagonal and followed up with some creative cutting--the same direction as the base only this time with a 4" x 10" piece of Summer Smooches Designer Series Paper.  Adhering the DSP to the Card Stock was a piece of cake.  Check out the instructions for this technique at Dawn O's video showing the  Twisted Fun Fold. We chose a nice and easy little bloom to accent our card. Then we used the Blossom Punch, the Modern Label Punch, and the 1 1/4" Scallop Punch, and spiced it up with a French Knot.  Check out this video from our friend "Frenchie" showing you how to make this special accent:  Frenchie's French Knot.  A really special card like this one would be nothing without a really special greeting, so we stamped the inside with a greeting from Perfectly Penned.  All papers, inks, and accessories used in this card are from Stampin’ Up! ©